Smallest 300mm and 600mm Lenses in the World

I am so sorry for this long-awaited post. The current status of Olympus micro four thirds lenses have been updated to be ALL MSC (Movie-Still-Compatible) except the pancake 17mm F2.8 and the discontinued 14-42mm mk1 kit zoom lens.

This is a visit I made to the Singapore Zoo not long ago. I must say these are currently the world’s SMALLEST 80-300mm and 150-600mm (equivalent) MSC lenses available! You can hold them in ONE hand.

On the left, E-PL1 with m-zuiko 40-150mm and to the right, m-zuiko 75-300mm.

They do not have great apertures for those longing for F2.8 or F2. The 40-150mm comes with F4-5.6 and the 75-300mm comes with F4.8-6.7. But common sense tells us that if they are made with F2-2.8 apertures, the sizes would be considerably larger. As usual, ALL images you see in this post are SOOC (straight out of camera) with no editing done other than adding watermark and black border.

shot with 40-150mm at 94mm, ISO1600, 1/60sec, F5.1.

shot with 75-300mm at 234mm, ISO3200, F6.4, 1/125sec.

By now, in the world of the mirror-less systems, it is obvious that Olympus faces tough competition from the Sony NEX and Panasonic GF series. The market share of Samsung is still quite negligible. When it comes to buying cameras, the general consumer usually follows the larger crowd BUT the discerning consumer will look more into details like Image Colors, Sharpness and Distortion, AF speed and the practical need of image stabilization (I.S.), etc.

shot with 75-300mm at 75mm, ISO3200, F5, 1/160sec.

shot with 75-300mm at 164mm, ISO2000, F5.8, 1/160sec.

In today’s digital photography world, it’s common for consumers to choose cameras based upon looks rather than actual performance. At the same time, consumers want instantaneous feedback regarding which camera they should buy, either from their friends, the internet or from the salesman they deal with. We gotta remember NO Review is completely accurate on the internet and NO camera’s LCD screen is totally trustworthy!

shot with 75-300mm at 300mm, ISO2500, 1/160sec, F6.7.

shot with 75-300mm at 300mm, ISO3200, F6.7, 1/160sec.

Some tips on choosing cameras:

1. NEVER just based upon the looks

2. Bring your own memory card to the shop/showroom and test shoot with the camera

3. NEVER trust the LCD screen, always judge the images using a reasonable computer monitor (most modern monitors are okay, and the MACs have the best colors)

The MOST RELIABLE way to check for Focus-Accuracy and Sharpness is “zooming” in at your computer, NOT on the camera’s LCD screen. That’s also the way I compared GF1, NEX-3 and E-PL1′s AF accuracy in my previous posts. Just click a word in the top left hand corner “SEARCH” box and you will easily access my previous posts.

4. Test shoot both in natural daylight and indoor artificial lights (white balance), test shoot on both still and moving subjects (AF-accuracy), test shoot the minimum focusing distance and infinity focusing at widest aperture (sharpness of images and closeup magnification factor), test shoot at high ISOs (cameras today have no problem with low ISOs but it’s good to check out what’s the maximum useable high ISO).

5. NEVER rush in your decision-making.

shot with 75-300mm at 208mm, ISO2000, F6.3, 1/160sec.

shot with 75-300mm at 300mm, ISO200, F6.7, 1/160sec. (this image is slightly adjusted brighter due to my own metering mistake)

shot with 75-300mm at 75mm, ISO500, F4.8, 1/160sec.

I do not write reviews based on test charts, curves, diagrams, etc. I write reviews based on my personal experience with the cameras and lenses. We have to understand that at many times, reviewers online (including me) are not given much time with the equipments to share the most balanced view about them. That’s why I make my own purchases when necessary.

As I walked into the zoo with my family, the 75-300mm lens became my main lens instead of the 40-150mm due to it’s 600mm (effective) telephoto capability. I did not have to squeeze with the many tourists to get a front view of the animals, my camera and lenses were the smallest among all tourists who were using DSLRs, and I had the BEST reach at 600mm effective!

I did not see anyone use the same equipment as me. It’s kinda sad that I saw more NEXs and Panasonics. But of course, DSLRs still dominated the entire zoo.

shot with 75-300mm at 300mm, ISO320, F6.7, 1/160sec.

shot with 75-300mm at 300mm, ISO320, F6.7, 1/160sec.

shot with 75-300mm at 300mm, ISO320, F6.7, 1/160sec.

shot with 75-300mm at 300mm, ISO320, F6.7, 1/160sec.

shot with 75-300mm at 300mm, ISO250, F6.7, 1/160sec.

Having tried the Sony NEX, the Panasonic GF1 and the Samsung NX-10 and NX100 (briefly), I would say the Olympus PEN produces the best colors straight out of camera. Among the mirror-less systems, Olympus PENs are still the smallest in size, having the smallest lenses among all.

The more knowledgeable people may argue about the limitations of a small sensor but we have printed out enlargements up to 50 inches wide with no problems.

The way I believe in photography is about using the right tool for the right job, and most importantly, in overcoming each camera’s limitations and still make outstanding images out of it.

The digital Olympus PEN, being the smallest interchangeable lens system camera which produces DSLR-like quality images with NO shutter lags like the compact point and shoots, is a great camera for anyone, to photograph your daily lives, to travel the world with it or to photograph your family snapshots.

shot with 75-300mm at 300mm, ISO250, F6.7, 1/160sec.

shot with 40-150mm at 150mm, ISO250, F5.6, 1/160sec.

shot with 40-150mm at 124mm, ISO250, F5.4, 1/160sec.

shot with 75-300mm at 75mm, ISO250, F4.8, 1/160sec.

The mirror-less system today is NOT for those who “need” to hang DSLRs on their necks to prove that they’re professionals or professionals-to-be, or for those who require 6-12 frames per second in shooting sports/birds/etc.

To me, images you make speak the loudest, NOT what you carry on your neck or shoulder. Like I said, the right tool for the right job.

This system is for those who don’t want to break their backs by carrying heavy equipments. It is suitable for light travel. It offers a great deal of opportunities for discovery, for example, the use of old manual focus lenses with F1 aperture on it. (Here)

It is ironic to see in general that newbies want big professional cameras, but the seasoned working photographers want smaller cameras.

In general, active street photographers love small unobtrusive cameras. A seasoned professional wedding photographer would not mind exploring into the use of smaller unobtrusive cameras to shoot weddings. I have personally shot weddings with a PEN and am now using one rangefinder camera alongside a DSLR for weddings and private functions. I also know of other working photographers who love their GF1s, PENs, etc. These professionals sure know the hidden photographic opportunities in the use of small cameras. DSLRs, Rangefinders or PEN, they serve different purposes.

shot with 75-300mm at 300mm, ISO2000, F6.7, 1/160sec.

shot with 75-300mm at 150mm, ISO2000, F5.6, 1/160sec.

shot with 75-300mm at 300mm, ISO3200, F6.7, 1/100sec.

Conclusion:

Advantages of these two lenses:

1. Small and portable. I love it when I am actually shooting the Baboon’s ass, standing at the back of some tourists holding big DSLRs with their huge telephoto lenses. LOL.

2. MSC (Movie-Still-Compatible). They are absolutely quiet in focusing when recording video unlike current DSLRs when AF sounds are easily recorded.

3. Sharpness. These lenses are absolutely sharp! Look at these 100% crop for example…

ISO3200, 75-300mm at 234mm.

ISO1600, 40-150mm at 94mm.

Disadvantages:

1. These lenses do not auto focus well in low light conditions due to their small maximum apertures of F4 and F4.8. Be prepared that they can’t find focus in low light.

2. When zoom is extended the maximum especially, it’s advisable to use the optional external electronic viewfinder VF-2 to help stabilize camera on your face. Looking at the Live View can make you giddy.

shot with 75-300mm at 300mm, ISO800, F6.7, 1/160sec.

My overall experience has been good.

1. The option of using the external viewfinder VF-2 is necessary when it comes to using long telephotos as such. So far, only Olympus has such a bright and sharp electronic viewfinder. The Panasonic one still sucks. It’s not even half as good as the Olympus one. The NEX has no such option.

2. The Olympus in-body I.S. is still most amazing. It offers opportunities for using slow shutter speeds without lugging a tripod. The NEX has no I.S. The Pannys limit their I.S. to only a few lenses. The Olympus I.S. works on ALL lenses which can be mounted on it, and that includes all legacy lenses.

3. The depth of field of these two lenses are sufficient for my usage at the zoo. I don’t need too shallow depth of field when capturing close up shots of animals. I’d rather all the hair and whiskers around the face to be sharp! (these are definitely NOT paparazzi lenses!!! They aren’t efficient in low light )

In my opinion (IMO), the 75-300 is good for travel, for safari. The 40-150 is a much lighter option. You can opt for the 14-150mm with the 75-300 in your bag, and these two lenses will be more than sufficient for traveling the world. Total weight? Less than a DSLR with a 18-200mm lens and you get coverage from 28mm-600mm (effective range). Woohoo!

I’m Impressed By the E-1…
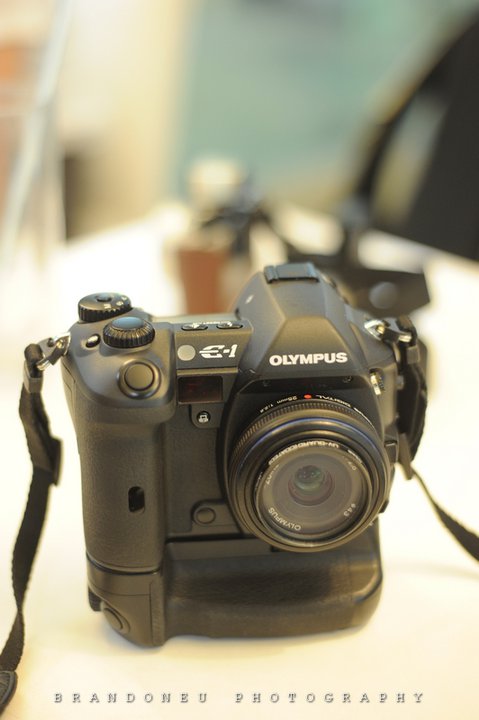
… … Yes! It’s Olympus E-1! Not the latest E-5… Hahaha…

I HAVE NOT USED A DIGITAL CAMERA WITH SUCH BEAUTIFUL STRAIGHT-OUT-OF-CAMERA IMAGES IN MY LIFE!

Digital sucked when I switched from film to digital more than 10 years ago and today, it still sucks when it comes to straight-out-of-camera images when I compare with my lab film scans in terms of colors and brightness…

Okay, I’m speaking in general terms here… the Nikon D60 is alright… the Canon 5Dmk2 when mounted with my old Zeiss lenses is alright… the Olympus E-30 and E-620 are quite good… the Olympus E-P1/2/L1 are slightly better than the E-30/620… the Nikon D700 is “clinically perfect” with not much character I know how to appreciate… the Leica M8/9 maintain that Leica look with stunning optics BUT auto white balance can be cranky…

If I look back at all the digital cameras I have used before, NOT ONE impressed me like this Olympus E-1 I just touched few nights ago!

This is a Year 2003 Camera! The detailed review can be found HERE.

I’m mad! No one is gonna read this post! But I am writing it. Cause I don’t write for money. I write for my own passion.

Camera images taken by Brandon Eu:

Image taken by Brandon Eu using Nikon D3, 50/1.8, Photoshop minimally-corrected.

It’s a 5MP Camera with a “whopping” 1.8inch LCD!

Image taken by Brandon Eu using Nikon D3, 50/1.8, Photoshop minimally-corrected.

Image taken by Brandon Eu using Nikon D3, 50/1.8, Photoshop minimally-corrected.

The ergonomics of the camera is perfect! I love the way the CF Card Compartment Door gently springs open with a twist… I used it without the extra battery grip and it’s perfect… It sits perfectly in my palm and works as if it’s a part of my body!

It’s shutter sound is as quiet as my Leica M6! This is shocking!

I like how luminous-landscape describes it’s ergonomics.

Do you believe that a camera has a “soul”? I do. It basically means you can feel the “spirit” of the designer, the amount of effort put in, the intricate thoughts put into each detail of the design meticulously, the direction and belief of the designer, whether the designer is an artist OR just someone out to make money from consumers… …

Let’s look at what the great Olympus Designer Yoshihisa Maitani once said:

“A photographer’s duty is to improve and increase his techniques! For knowledge of technique is the only tool for ensuring that the camera may be used to its maximum capability. So many photographers overestimate the function of the camera by itself – but I’m afraid a cook who relies on nothing but a sharp knife has no guarantee of producing excellent dishes.”

another quote would be:

“Even if your camera can capture shots of outer space or bacteria, it’s useless if you don’t have it with you …”

Yoshihisa Maitani is a legend.


A camera is not just a camera. It’s used to take photographs. And it’s the person behind it who does it. And it’s the individual soul you see reflected in each person’s works.

The photography process is emotional! It’s NOT just about holding a photograph in your hand or looking at a 72dpi image on the screen! It goes far beyond that! It starts the moment when we hold a camera!!!

Why do I love Leica? It’s NOT because it’s a luxurious brand. It’s purely because I could feel the spirit of the Leica designer Oskar Barnack!

The same goes when I hold my Olympus OM-1, the PEN FT, and now the E-1. Though the E-1 was not designed by Maitani, it definitely followed after much of his spirit.

The entire process into making a photograph should NOT be restricted just to the final image.

I’ve always believed, if you hold a camera you love in your hands, you are naturally a happier person. A happier and more confident person already has half the battle won!

(this I learned from a good friend named Joe Meng)

Now, let’s continue my madness into searching for the old and forgotten…

Let’s look at how I managed the E-1 with the zuiko digital 25mm F2.8 pancake lens, with the restriction of ISO400 (I was told that ISO800 is not really useable by David Ching who lent me the E-1), shooting in a Pasar Malam (night market)!

I shot ALL wide open at F2.8! And the E-1 has beautiful TIFF files! The shutter is so quiet that I managed to take a couple of really close distance shots of strangers and NOT get caught.

The following images are resized as jpegs for easier uploading/downloading. Do email me if you are interested to see the full res images. (If you even bother to read this far regarding a 2003 model… LOL…)

If you would like to use my images, please inform me via email, CREDIT and LINK to my site. Thank you!

(NOTE: I just realized that the 5MP TIFF files are so “BEEFY” that I need to resize them much further due to WordPress restrictions! I’ll be really curious to try how large an enlargement I can make next… stay tuned for future posts…)

waiting for food. accidentally set to F3.5, and minus 1EV, brighten up a little in Photoshop, A-mode, ISO400, 1/15sec, AWB.

Handicapped Performer. A-mode, ISO 400, F2.8, 1/13sec, AWB, EV-1.

Clothes Seller. When the camera was handled to me in the dark, it was at EV-1 by accident, so I brightened up this shot a little in Photoshop. A-mode, ISO400, F2.8, 1/30sec, AWB.

Kids, A-mode, ISO400, F2.8, 1/30sec, AWB, 0EV, absolutely no touch-up done except resizing.

Baby. A-mode, ISO400, F2.8, 1/25sec, AWB, 0EV, absolutely no touch up except resizing.

Fruit Seller. A-mode, ISO400, F8, 1/10sec, AWB, 0EV, absolutely no touch up except resizing.

Dog. A-mode, ISO400, F2.8, 1/200sec, AWB, 0EV, absolutely no touch up except resizing.

Moving Kid. A-mode, ISO400, F2.8, 1/13sec, AWB, 0EV, absolutely no touch up except resizing.

Moving Car. A-mode, ISO400, F2.8, 1/2sec, AWB, 0EV, absolutely no touch up except resizing.

Lady considering what to buy. A-mode, ISO400, F2.8, 1/25sec, AWB, 0EV, absolutely no touch up except resizing.

Piggy Back. A-mode, ISO400, F2.8, 1/60sec, AWB, 0EV, absolutely no touch up except resizing.

Man. A-mode, ISO400, F2.8, 1/30sec, AWB, 0EV, absolutely no touch up except resizing.

Mail in Danger. A-mode, ISO400, F2.8, 1/10sec, AWB, 0EV, absolutely no touch up except resizing.

Counting Cash. A-mode, ISO400, F2.8, 1/25sec, AWB, 0EV, absolutely no touch up except resizing.

Now, a search on eBay shows a MINT condition E-1 body is around USD450.00.

Like Maitani said, “… … a cook who relies on nothing but a sharp knife has no guarantee of producing excellent dishes.”

Will you consider restricting yourself to ISO400 or maximum 800, 5MP TIFF files and a 1.8inch LCD?

For all I know, I love this camera, and I shoot it like a film camera, with absolute confidence of getting what I want out of the camera! And I think the E-1 with the 25mm pancake is a perfect combination!

Penang Olympus PEN Workshop Photowalk

These are the images I took during the Penang PEN workshop which I conducted. Images are shot with the Olympus PEN E-PL1 and the 14-42mm kit lens. We had a fun 45 mins’ time of shooting before heading back to the classroom for photo critique.

The images are shot at ISO3200, with noise reduction and noise filter OFF. Some are slightly adjusted for brightness, that’s about it. No manipulation of colors are done.

Tourists in Penang, intended camera shake and tilt.

Sleeping

I actually contemplated to post process them into black and white since I am recently on a personal project on “Portraits of Strangers” which is done on black and white film BUT after seeing the original colors from the Olympus digital PEN, I decided to keep it that way… my usual style… NO CROPPING, NO UNNECESSARY MANIPULATION.

Old Cinema Exterior, man walking pass.

Portrait of a man outside the Cinema

I am a strong believer in “getting it right” at the time of shooting, and not crop pictures afterward. Cropping during post-processing should be kept to the minimum… like hip shots, when the expression of strangers is all that counts!

Kachang Puteh (peanut snacks) Seller outside the Cinema

Cinema Ticket Booth

The world is moving really really FAST in technology, and it’s been about a year since I first knew my E-P1… and now we have the E-PL1, two models after the E-P1. Before we could really experience a camera and review it, a new one is out, forcing reviewers and geeks alike to abandon the old one. Of course, the current curiosity will be about the Sony NEX-5 as well, which boasts of a larger sensor.

A really friendly tourist

He even took off his shirt just to let me photograph his tattoo!

I am First a Photographer, second a geek… in fact, I think I have gone back in time… back to larger and larger format films… oh, there goes my geekiness…

I love shooting, love making images, love expressing myself through images, love capturing others’ lives into images… so my focus will always be on creating better and better images rather than playing with new toys.

First Day of the Chinese Hungry Ghost Festival, here's a little camera shake as I was walking while shooting. I like the man's expression.

First Day of the Chinese Hungry Ghost Festival

As for the “camera experience”, we NEED time to explore each and individual camera to experience it. Today’s reviewers can be just TOO QUICK to come to conclusion on each new camera they review.

Portrait of a Trishaw Rider, he works in another job during the day.

He's born with a "lazy eye" condition but has since gotten used to it.

After using the mirrorless system and the E-PL1 for a while now, this is what I feel currently:

1. I do miss the mirror sometimes. NOTHING can replace the feeling of having an optical viewfinder OR the sensation of the mirror flipping up and back. Perhaps if Olympus can make the digital PENs like the Leica M8 and M9, a TRUE rangefinder with an optical viewfinder, and design the looks based on the old half-frame PEN FT, wouldn’t that be sooooo-attractive??? I would really love it! The M8s and M9s are mirrorless! Is there no one else in the world that can build mirrorless digital rangefinders like the Leicas? I wonder…

And for that “sensational mirror experience” reason, I think the mirror (DSLR) system should stay in the future…

Taxi Booth

2. If you are one who grow tired of kit lenses easily, and like to venture into vintage lenses, manual focus lenses, old but legendary Olympus, Nikon, Canon, Leica, etc.. lenses… there’s ONLY one way to manual focus with confidence and speed at the current moment: the EVF-2! It’s a MUST! (Read HERE!)

And if you like to use the new 14-150mm lens, the EVF-2 will help stabilize your shooting tremendously when you zoom all the way in at 150mm! I just can’t do without it!

Carpark Booth

3. One thing I just couldn’t understand till now: a cheap RM399 digital compact can have “auto-rotate” feature built-in for it’s images BUT not the E-PL1!!! I am furious at this!

4. A consolation for Olympus PEN Users: if you do a check on www.dpreview.com for image comparison between the NEX-5, Canon 550D, Samsung NX-10, Panasonic G2 with the E-PL1… the E-PL1 is a clear winner!

BTW, one of my previous post did a comparison between the E-PL1 and the GF1 and the difference is clear.

Ok, before I start a “tribal war” here, I must say, I did enjoy using the GF1 for a short time and I don’t think the NEX-5′s menu interface is as bad as what some reviewers say. Color preference is totally personal and I prefer Olympus. You may prefer Panasonic or something else.

Peace!

Another Friendly Trishaw Rider

5. I find that Pop-up flash is not really that necessary since they don’t produce very nice pictures anyway… so I can do without it. I just refuse to shoot at really bad lighting situation. I simply don’t feel that I have the need to prove that my camera can shoot in super low light or no light! Image is gonna suck anyway, and I am not a paid paparazzi!

6. The E-PL1′s Image Stabilization loses out to the E-P1 and E-P2 by about 1-2 stops… so I ended up sometimes with blur images shot at 1/4sec when I could get it sharp with my previous E-P1 and E-P2. Arrgh….

A close up portrait of Steven, the trishaw rider. I just like his white moustache!

7. The high ISO of the E-PL1 is much smoother and the images are sharper than the E-P1 and E-P2 due to a thinner anti-aliasing filter installed.

8. I know that larger sensors are better in depth-of-field performance, so when I want that large sensor effect, I’ll fit on one of those F1.1 or F1.4 manual focus lenses to get the shallow d.o.f. That’s the way I overcome the small MFT sensor.

And as for enlargement capabilities, I have no issue with the PEN since I have ever printed 30 by 50 inches prints from the E-P1′s files. Of course, we can’t say the quality is better than a full frame sensor… BUT is it good enough??? You bet it is!

For a small and portable camera which produces high quality images, my other choice will only be the very expensive Leica.

It’s funny that in today’s world, people like “overkills”.

When photography should be centered on making better and better images: images that speak… we tend to focus on how expensive and how good our equipments are instead.

9. As for the “missing dials” in the E-PL1… I mean the dedicated dials for aperture and shutter speed… I still like to have them back… I really hope the next PEN will be “the one”.

10. The lovely Art Filters… oh… this is something Olympus has exclusively! And its’ a wonderful feature. However, I only like to use the Pin-hole Art filter and sometimes the Diorama Art Filter… but the Grainy Film Art filter, it can be too contrasty for my taste at times, with details in the shadows and highlights clipped! As for the other Art Filters, I hardly even use them.

11. I also discovered that the Panasonic 20mm F1.7 lens when mounted on the PEN, does not give 100% reliability in nailing the focus.

I am not quite sure if this is a communication issue between Olympus and Panasonic… NOT that it is a crucial issue, maybe 1 to 2 out of 10 shots (especially during low light) tend to miss focus… that’s all. But it can be a little disappointing at times.

Finally, to Olympus,

I believe you have heard enough NAGGING from faithful users around the world:

“WE WANT FAST LENSES! FAST PRIMES! FASTER AF TOO! GIVE US F1.4!!!”

More about the Olympus E-PL1 and my experience with MFT

I’d like to share what I think I missed out in my previous post about the comparison between the Panasonic GF1 and the E-PL1. Also, I’d like to share a short summary of what cameras I have been using during the couple of months I went missing from this blog early this year.

Basically, from the E-P1, I switched to the E-P2. At first, my initial impression of the E-P2′s EVF2 (external electronic viewfinder) wasn’t so impressive. Yes, up till today, it is the highest quality electronic viewfinder you can ever find on earth, no other brands can match it yet. The Panasonic GF1′s EVF really sucks badly when you compare them side by side.

But in my then E-P2 Review, I wrote that looking through the EVF is no different from watching Live View through a peep hole. In the months when I went missing from this blog, I found out that this wasn’t true! The Olympus’s EVF2 is about the ONLY thing in the world today which can make Manual Focusing of old SLR lenses, Leica M-Mount lenses, and even the C-Mount lenses on the Olympus PEN E-P2 and E-PL1 POSSIBLE!

I get as high as 10/10 hit rate in terms of nailing my focus using the EVF2 on my E-P2, even when I was using the Voigtlander Nokton 50mm F1.1 lens wide open! Using Live View to manual focus is just too time-consuming, too tedious and too slow!

Yes! The Micro Four Thirds Mount can mount almost limitless types of lenses on it via adapters! And China make most of these adapters at really affordable prices! The Micro Four Thirds System shall rock the world of photography!

I shall write more about using these various lenses in my next few posts, so stay tuned.

After switching to the E-P2, I started my indulgence into using the EVF2 to manual focus with all sorts of manual focus lenses (including old Olympus SLR OM lenses, of course). This is addictive! At the same time, I tried out the Panasonic Lumix MFT lenses.

And finally, the road led me to the E-PL1. (For buddies who have been hanging out with me, they also saw my indulgence into many other types of cameras… Leica being one of my favourites! Haha… sinful… )

An overall experience told me that for AF lenses, my favourite is the Lumix 20mm F1.7. As for MF lenses, there are quite a few I really like: the Nokton 50mm F1.1, and the C-Mount Ampex 25mm F1.4 TV lens in particular.

I prefer the look and feel of the E-P1 and E-P2, but I think the E-PL1 is currently the most practical choice for me. The E-PL1 is a more intelligent camera, produces sharper and nicer images, is smaller and lighter, and more comfortable to hold. However, I really hate the menu system. According to Olympus, this camera is supposed to be simpler and easier to use. But I find it otherwise.

Fiddly Menu in the E-PL1, CW trying hard to find out how to switch apertures. This image is captured with my iPhone.

Both CW and I were having a hard time trying to find out how to switch apertures. We, like most of you out there, don’t read menus! Haha…

And on a separate occasion, I passed the E-PL1 to another of my photo-enthusiast friend to try out, he had a hard time trying to change ISO.

What is this??? Is it just us being “too advanced” to understand the “simpler” menus in the E-PL1, or is Olympus misunderstanding what the consumers need? Sometimes in trying to make something simpler, we made it more difficult. Less is More? Simpler is Complicated? Hahaha….


Just to share some E-PL1 shots here, all with minimum tweaking, Olympus is famous for beautiful digital images straight out of camera!

A quick shot of the busy Satay Man. ISO1600, F5.6, 1/20s.

Trying out the POP UP FLASH in E-PL1 … …

Personally, I wouldn’t bother much about pop-up flashes, since all pop-up flashes in the world do not produce as pleasing results as external hotshoe flashes which can bounce. Bad lighting? I’d rather not shoot. Pop-up flashes aren’t gonna make it much better.

Shot by CW.

The E-PL1 is also perfect for hip shots:

Hip Shot of Uncle, a little post-cropping done. ISO200, F7.1, 1/250s.

Corn Salesman. Shot from hip level using Live View. Something not possible with my Leica M6 and M8. ISO200, F3.2, 1/200s.

The above images speak for themselves Olympus’s image qualities!

I imagine one day, I show my son a photograph of a morning glory and teach him what’s purple, he replies, “It’s BLUE!” And I will say, “Oops! That’s Panasonic!”

I’d rather go for the E-PL1. :p

Related Posts:

1. GF1 vs E-PL1

2. E-P2 Review

3. E-P1 Review

Olympus E-PL1 vs Panasonic Lumix DMC-GF1

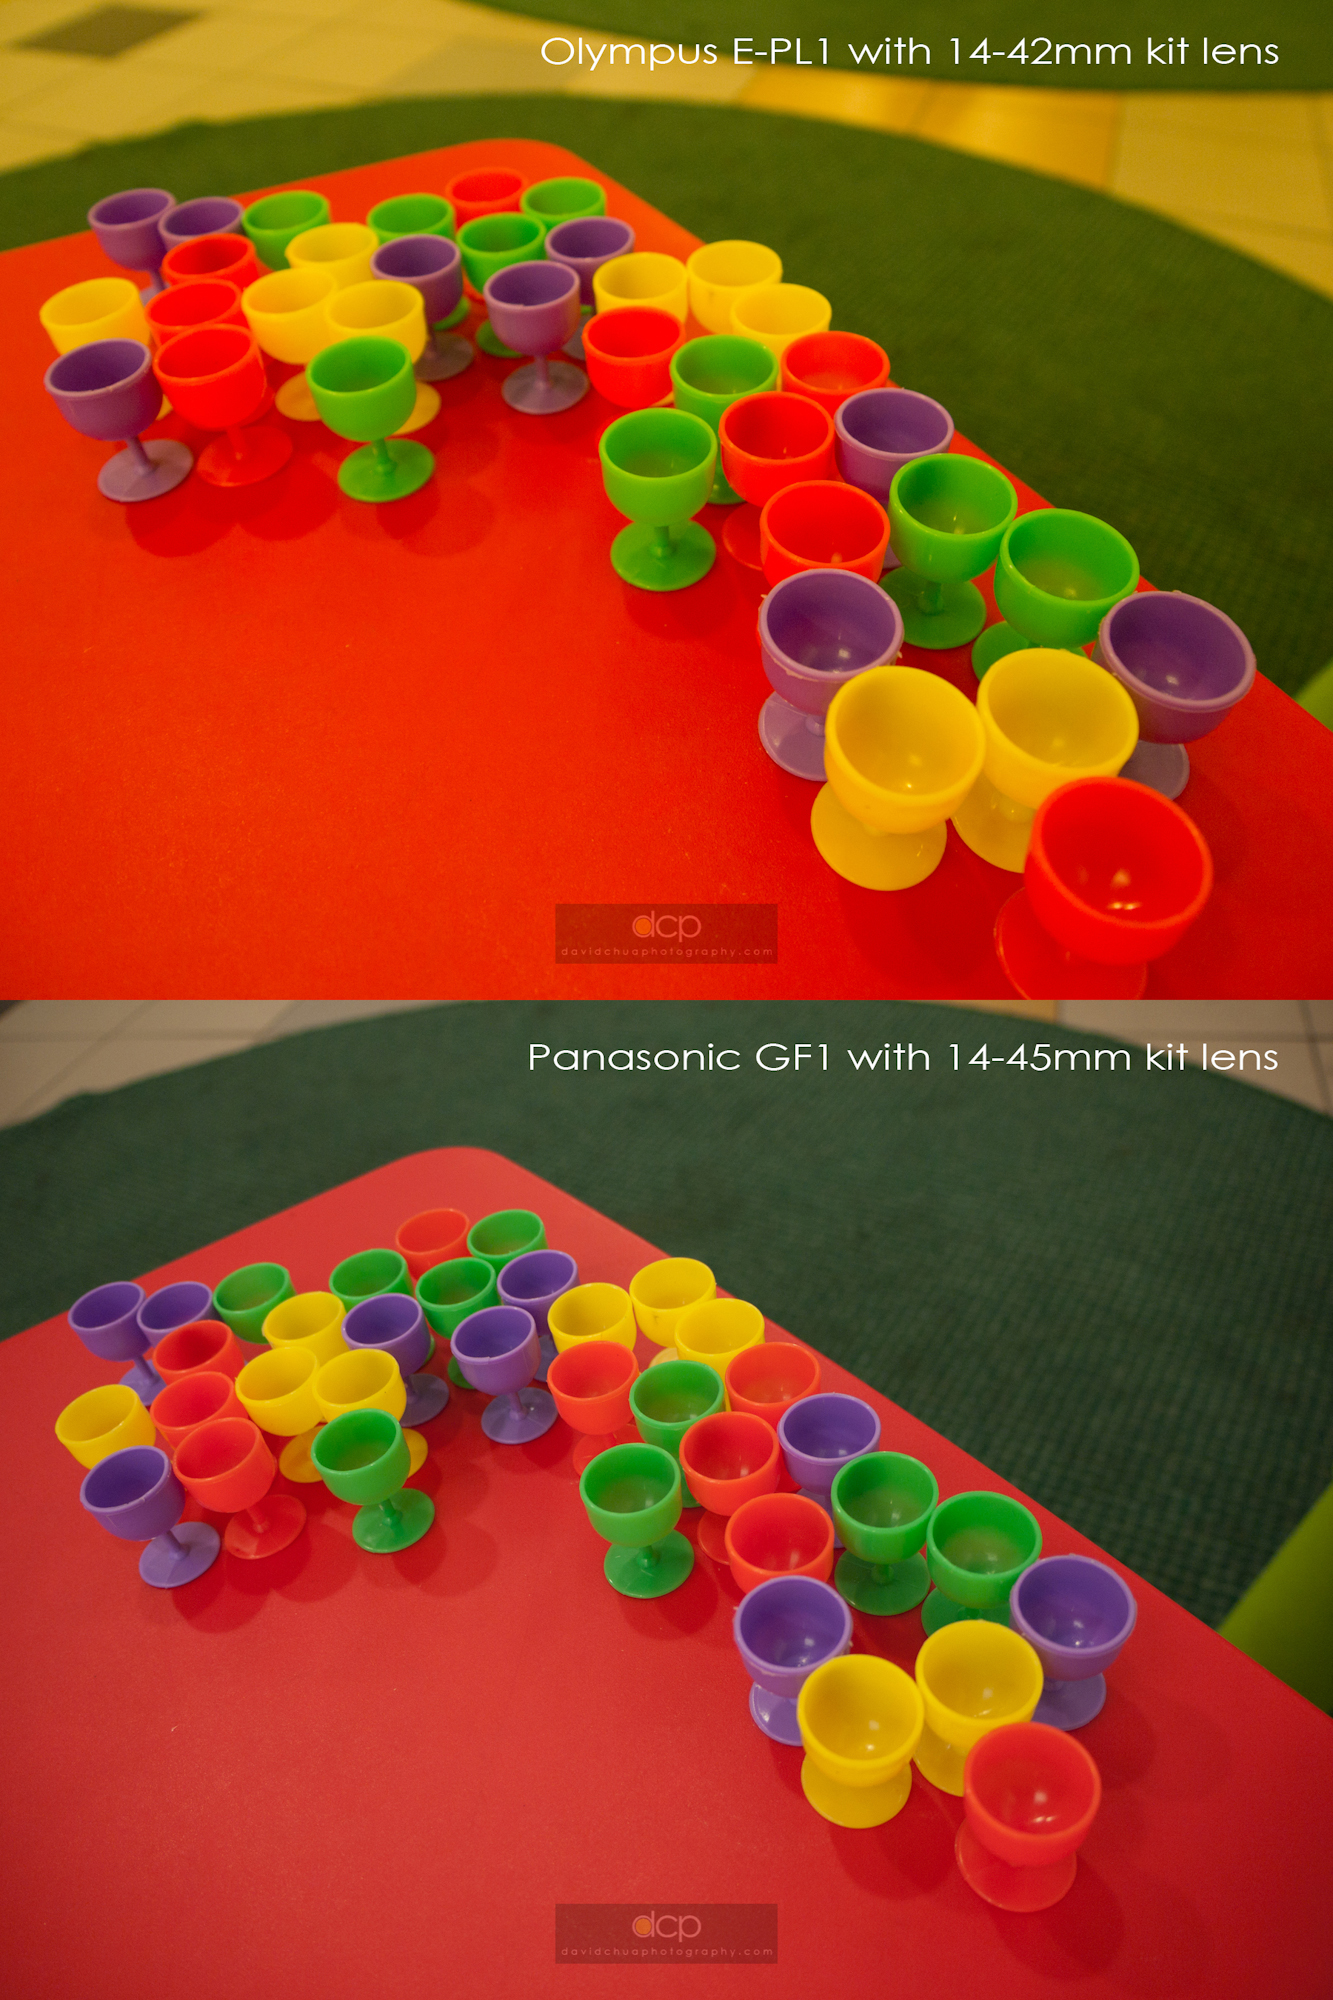
Finally, I have now got hold of the Panasonic GF1 with it’s Lumix 14-45mm kit lens (Thanks to my friend CW) and the latest Olympus PEN E-PL1 with it’s M-Zuiko digital 14-42mm kit lens! Now, this shall be a FAIR COMPARISON, as much as possible, as both are with their standard kit zoom lenses.

I am writing this review of comparison between the two cameras in the SIMPLEST manner I can think of, yet hopefully good enough for the layman, and even for one who has ZERO knowledge of cameras and photography, to make a clearer decision between the two, i.e. WHICH TO BUY?

NO REVIEWER IS 100% BALANCED. So, make your own conclusions!

We have to understand that both cameras’ main target audience are NOT the Professionals. The main target audience are consumers, ordinary students, daddies, mummies… and photo enthusiasts who want something small to carry with them daily… yet something that way surpasses the usual compact digital cameras’ standards in image quality and handling.

We have also seen the Micro-four-thirds cameras landing in the bag of professionals as a leisure camera, second camera or a backup camera, and some use it for work like myself, or Kirk Tuck.

BUT this review is aimed NOT at the professionals.


In this review, I shot with both cameras set to iAuto Mode. I used them in my everyday life. I shoot like an ordinary Daddy, like what every dad would want to photograph his child. I used both cameras NO DIFFERENT from any of you out there. So, the images I am gonna present here are NO GALLERY PRINTS. :p

My Workflow:

Shot with both cameras using RAW, iAuto Mode. I used them in Normal Circumstances as an ordinary guy in his everyday life, shooting in shopping centres, shooting his own kid, shooting at home and wherever he goes. All images are converted to JPGs using Lightroom Beta 3 version in default mode with no additional modification to the files at all, not even exposure, just to show you what comes out straight from the cameras.

WHY SHOOT in iAUTO MODE?

These Micro Four Thirds cameras are meant to produce amazing pictures straight off the camera without having to adjust much settings. If I want a camera to adjust it’s settings as a playtime, it would be the Nikon D700 or the Nikon D3s. There is at least 100 menu options in them to choose from. Now, at least in my personal philosophy, I expect the camera to meet or exceed my expectations at it’s so-called most intelligent “iAuto Mode”!

iAuto Mode is supposedly much better than P (Program)Mode, or in Cantonese as a joke, what we call the “PUN” Mode (basically means “idiot mode”). It’s supposed to be much more intelligent than the P Mode. Now let’s see how “intelligent” each camera behaves… … here we go… …

NOTE: All images are uploaded in the highest tolerable resolution online in this blog possible for you to download and pixel-peep. To do that, keep clicking on image till you can right click and save the high resolution file.

1. Indoor Artificial Lighting Condition – Shopping Centers (Most digital cameras suck at this)

Verdict:

Digital cameras have always got a problem with reds. There are very few digital cameras that can reproduce red accurately. As both shots were shot in iAuto Mode, white balance was AWB(auto). In this instance, Olympus over-cooked the reds and Panasonic produced more neutral colors.

2. Action Shots Indoors using iAuto Mode

Verdict:

In handling the cameras, immediately you will feel that GF1′s auto-focusing is faster and seems more decisive and definite. Initial impression is that the GF1 “found” focus and snapped the shutter much faster than the E-PL1. BUT upon scrutinizing both cameras’ files in my computer, I have found that the GF1 may have activated it’s shutter much faster and easier than the E-PL1 but to my disappointment, the hit rates are just as bad as the E-PL1! The number of “useable” images shot in iAuto mode for both cameras, chasing after running kids, are just about the same amount! We are talking about nailing the focus.

Suggested Solutions:

A. Buy a DSLR which performs well through ISO3200 and above like the latest Canon 550D which is good through ISO6400

OR

B. Use ISO1600 on either the E-PL1 or GF1 coupled with a fast lens like the Lumix 20mm F1.7. Shoot RAW and convert using Lightroom or Photoshop and you get lesser noise than direct JPGs straight out of camera.

3. Macro Test, using the minimum focus distance on each lens

Verdict:

It is quite clear that the E-PL1′s 14-42mm kit lens has a much closer focusing distance which gives higher magnification though it underexposed. But just a little exposure adjustment either in-camera when shooting or in your computer will bring it’s shine back easily!

4. i-Auto Intelligence in using In-Body Image Stabilization and Lens Optical Stabilization in lowlight conditions

Verdict:

It’s not fair to say that Olympus’s in-body I.S. is better than the Panasonic lens’s O.S. here as the iAuto mode in both cameras gave a drastic difference in ISO, which results in different shutter speeds.

But what we can see here, and from all the above examples so far is that Panasonic tends to give a lower ISO which results in slower shutter speeds. In this instance, the intelligence in the E-PL1 beats the GF1.

Panasonic should learn that it’s lens’s O.S. is not good enough for 1/8s in it’s iAuto Mode! Having this happened in iAuto Mode is quite unforgivable unless they are like the Nikon guys who expect us to dabble an hour or two with it’s menu before shooting. Unlike Olympus, I have done many shots with the E-P1 and E-P2 at shutter speeds as slow as 1/2s and achieved sharp images using it’s in-body image stabilization!

5. Daylight Photography

Now, by today’s digital photography technology standards, all cameras should already have no problems rendering DAYLIGHT images. Let’s see … …

Again, the reds are different here. Maybe it’s just “different film” we are looking at here? Which “film” do you prefer? Also, the iAuto on both cameras focused differently. But this can be done manually by “re-focusing” the camera (just let go of shutter button and press another few times till desired focus point is achieved or manually select focus point).

Digital cameras not just have a thing about the reds but also the purples. Both cameras rendered purple very differently. If we talk about reality, Olympus rendered purple as purple, much closer to the real colors. As for the Panasonic, morning glory has turned blue.

My boy wanted rain in such extremely hot season lately. Personally, I prefer the greens from the Olympus in these shots.

Next, we look at the ergonomics of both cameras.

Front View of Olympus E-PL1 and Panasonic GF1

Back to Back - Olympus E-PL1 and Panasonic GF1

Olympus's 14-42mm Kit Lens collapsed to it's smallest size on E-PL1 vs Panasonic GF1

Both Cameras at 14mm

Both Cameras at maximum focal length, Olympus at 42mm and Panasonic at 45mm

Verdict:

1. Panasonic doesn’t seem to understand the power of Micro Four Thirds is in it’s SIZE too. The pursuit of producing High Quality Cameras in the smallest size possible. Even Ricoh understood that! (Beautiful GXR!) It’s either we settle down on the size of a typical DSLR or we go really small.

2. The collapsible Olympus kit lens is even lighter than the ones that came with the E-P1 and E-P2 this time, having a plastic mount. The front element when extended still is wiggly though it does not affect it’s function at all. If you want something real solid, go for the Leicas. :p

3. The grip on the E-PL1 feels much better and more comfortable than the GF1. The GF1 is a little heavy for it’s smooth grip.

4. The shutter sound on the E-PL1 sounds nicer to me. The GF1 sounds clanky.

5. Though the GF1 seems quicker in releasing it’s shutter, results have shown it does not necessarily means nailing the focus better than the E-PL1.

Overall, the GF1 looks more classy, expensive and professional and the E-PL1 looks more plasticky BUT I personally prefer the lightweight E-PL1 and it’s overall image performance. Again, if I want something real professional, classy and small, it will be either the Leica M8 or M9.

As compared with the E-P1 and E-P2, this is what I discovered:

1. The E-PL1 is much sharper than both E-P1 and E-P2.

2. The AF on the E-PL1 is slightly faster than the E-P1 and E-P2. The AF is exceptionally fast with the NEW m-zuiko 9-18mm lens. This one I hope I can get a copy for further review at a later stage but I tried it once and it was really impressive!

3. The E-PL1 is more intelligent in handling backlit situations. It is also overall more intelligent than the E-P1 and E-P2.

I hope I have not made people more confused and all the effort I put in this post helps someone out there. :) Cheers!

Bookmark me, subscribe to my blog, comment or email me to make a friend. Stay tuned for more updates very soon!

Related Posts:

1.  Olympus E-P2 Review

2. The Launch of Olympus E-P2

3. Event Shoot using E-P1

4. Olympus E-P1 Review

5. Wedding by E-P1

Olympus PEN E-P2 Review

Basically, the new added features on the PEN E-P2 are quite minimal. The main differences of the E-P2 vs the E-P1 are:

1. Two NEW ART FILTERS: Cross Process and Diorama,

2. A hot shoe for the highest quality Electronic External Viewfinder currently in the market, in which the same hotshoe is used for the Olympus external mic to collect the best quality sounds during HD video recording,

3. Focus-tracking (it locks the focus on a moving subject. Unfortunately, I tried engaging the continuous-shot/sequential-shot mode but it failed. Focus-tracking can only be used on single-shot mode.),

4. I-enhance mode (if you are a MAC user, it’s like the “enhance” button in “IPhoto”. It does improve the colors.),

5. You can now use remote control to control your slideshow-viewing when the camera is connected to the HDTV via HDMI cable.

Below are some shots I did with the new Art Filters. To show the effects of Cross Process, I did an extreme comparison with the Pop Art filter to show the differences in color rendition. To me, Pop Art gives a “Leica-like” or color slides kind of saturation. Traditionally, if you print a color slide on a photographic print, you get real saturated colors. “Cross Process” brings the colors to another extreme.

Comparison between Pop Art Filter and Cross-Process Filter

Comparison between Pop Art Filter and Cross Process Filter

Cross Process Effects:

Uncleared mess from a torn-down building with apartment flats in the background

Uncleared mess from a torn-down building with apartment flats in the background

Reflection on the ground

Reflection on the ground

My Reflection

My Reflection

Now I know some helicopters have 5 propellers

Now I know some helicopters have 5 propellers

A Corridor View of a Typical HDB Flat in Singapore

A Corridor View of a Typical HDB Flat in Singapore

Malaysia LRT

Malaysia LRT

View from Overhead Bridge, Malaysia LRT

View from Overhead Bridge, Malaysia LRT

Boy waiting on staircase

Boy waiting on staircase

In film days, cross-processing is done by either shooting color slides and processing them using color negative chemicals OR the other way round. Today, this is still very much loved by the lomographers and myself.

Below are some shots done with Diorama Art Filter. It mimics the effects of a tilt and shift lens. If you shoot subjects from a distance, the images give you a miniature effect, like the name “Diorama” describes. I also wrote about a friend purchasing the tilt and shift lens HERE before. To show the difference between Diorama and ordinary images, see below.

Image with No Diorama Art Filter applied

Image shot in Natural Mode with No Diorama Art Filter applied, somehow I found that the E-P2's Natural Mode does not produce as rich colors as the E-P1, this is probably due to me using a pre-production E-P2 with firmware not upgraded yet.

Image with Diorama Art Filter applied

Image with Diorama Art Filter applied

Here are some other images shot in Diorama Art Filter Mode:

Singapore HDB Flats

Singapore HDB Flats

Singapore HDB Playground and Recreational Park

Singapore HDB Playground and Recreational Park
Children playing soccer

Children playing soccer

Another view of the HDB Recreational Park, Singapore HDB Flats are like condominiums!

Another view of the HDB Recreational Park, Singapore HDB Flats are like condominiums!

Just for comparison, here are also some samples of similar effects created with a 5Dmk2 and a 45mm tilt and shift lens shot by Mr Peh:

pehcw1

pehcw2

pehcw3

Summary:

1. I find the two new Art Filters very interesting and useful especially the Cross Process Art Filter, since I love the cross-processed look. The Diorama effect also can freshen up perspectives and inject new inspiration into shooting.

2. The Electronic External Viewfinder is like looking at Live View through a peep hole. It is of very high quality 100% viewing but to me, it does not make much of a difference since I hardly shoot in extreme sunlight glare conditions and so I’d rather use Live View. I have found that using Live View freshens up my perspectives in shooting by offering a whole new range of possibilities and angles achievable! I have no complaints at all on the high quality LCD Live View offered on both the E-P1 and E-P2. Don’t you forget, Olympus pioneered Live View among all other brands! And of course, now they created the highest quality external electronic viewfinder you can ever find in the market. For all those who have this thing about using viewfinder to shoot and “hate” Live Views, the E-P2 is a good option.

3. For video lovers, the E-P2 will be a much better choice since you can get much better sound quality using external mic and also have the option of using the 2 extra Art Filters plus Manual-exposure mode in the video mode for creativity. Almost all the Art Filters are useable in the HD Video Mode except the Pin-Hole Art Filter which does not produce a smooth quality video (video-recording is stunted) and also the Diorama Art Filter which records in 2 frames per second but playback in 15 frames per second. However, the Diorama Art Filter Video gives you another creative option to record a “Charlie Chaplin” kind of comical effect, but in color and creative blur. Even videos shot using Pin Hole Art Filter can appear artistic. It depends on your creativity.

4. Focus-tracking is great but I will love to have it more functional in sequential/continuous-shot mode as it’s better to shoot a few more frames for moving subjects. It’s a pity that when I use it in sequential-shot mode, the frames slow down quite a bit, in which I find it not useable.

5. And as for the i-enhance mode, it’s another great option for nicer colors (actually I find that Olympus’s colors are already very nice by default). The HDMI remote feature frees you from sitting inches-near to a HDTV if you often do on-the-spot presentations. Nice option for family get-togethers if you are often the family photographer.

Olympus is selling the E-P1 alongside with the E-P2 together, so I don’t think E-P2 is a replacement model. At about RM1k more (RRP: RM3799), it’s worth the difference if you are fanatic over the two new Art Filters OR you are a creative video person who would want to use the new Art Filters for Video and get better sound quality OR if you “MUST SHOOT WITH VIEWFINDER”. I believe the E-P1 still caters for the majority in terms of pricing.

Lastly, if RM1k is no big deal to you, BLACK IS NICE! I love BLACK! Cheers!

Olympus E-P1, A Class of It’s Own.

Olympus PEN E-P1, image taken from dpreview.com

Olympus PEN E-P1, image taken from dpreview.com

I’ve been a professional photographer for more than 12 years, specializing mainly in portraits, weddings, people photography, whether choreographed or on-the-move. I have been a fervent Canon and Nikon user for years. But never have I encountered a small camera like the Olympus E-P1 that produces such quality in it’s size with such user-friendly features.

Talking about “Making Photography Easy”. For years, since the camera was invented, the world has been wanting to make photography easy. A view-camera needs about 11 adjustments in order to take a picture. Then came the Nikons and Canons that only require THREE adjustments: Aperture, Shutter Speed and Focus in order to take a picture. And if this wasn’t easy enough, cameras that came later began to even do all THREE adjustments for us – the Program Autofocus SLRs!

To read a detailed article on the above, click here.

Olympus E-P1, shot through car windscreen in a rain, B&W art filter

Olympus E-P1, shot through car windscreen in a rain, B&W art filter, 16:9 format.

Olympus E-P1 set to manual focus, b&w art filter.

Olympus E-P1 set to manual focus, b&w art filter, 16:9 format.

This shot shows that E-P1 is quick enough to capture action. My son did this action in a split-second. Tough not as fast as a DSLR, it is not that bad afterall.

This shot shows that E-P1 is quick enough to capture action. My son did this action in a split-second. Though not as fast as a DSLR, it is not that bad after all.

I often ask myself, “Why do camera-designers always want to make things easier for us?”

Especially as a earning professional photographer, doesn’t it seem obvious that as photography gets easier and easier, our commanding prices go lower and lower since more and more people think that they can “do-it-yourself” anyway?

But if I think as an artist, I just want to focus on my feelings, my imaginations, my visions and indulge in all my five senses when I go out and create images with my camera.

Isn’t it so much easier to have a camera that doesn’t interfere with my thoughts, by introducing questions like what aperture to use and what shutter speed to set or whether the image is in focus?

Okay, you may disagree with me on this cause deciding how blur the background we want it to be or whether to use a slower shutter speed to depict movement, or whether to set it off-focus in order to create some abstractness do play a part in our creativity process.

But my point is, sometimes it really helps if you just indulge in all your five senses without being distracted by technical functionalities, and shoot what you feel!


Olympus E-P1, B&W art filter. I pre-focused the camera to infinity before reaching out to shoot the birds returning to their home using the grainy black and white art filter mode.

Olympus E-P1, B&W art filter, 6:6 format. I pre-focused the camera to infinity before reaching out to shoot the birds returning to their home using the grainy black and white art filter mode.

Who says you can't see beautiful sunset downtown KL? Shot using "Sunset" Mode in Olympus E-P1

Who says you can't see beautiful sunset downtown KL? Shot using "Sunset" Mode in Olympus E-P1, 16:9 format.

Shot using "Pop Art" art filter, Olympus E-P1. This is a spontaneous shot, again done within seconds spotting the chef's head covered by a bunch of roast pork

Shot using "Pop Art" art filter, Olympus E-P1, 16:9 format. This is a spontaneous shot, again done within seconds spotting the chef's head covered by a bunch of roast pork

Olympus E-P1, shot using "landscape" mode. It really does make the sky much nicer.

Olympus E-P1, shot using "landscape" mode. It really does make the sky much nicer., 6:6 format

In today’s digital professional photographer’s context, things have just gone a lot worse! Our modern DSLRs contains at least 100 menu and function options! It throws you questions like “D-Lighting Off, Default, Auto, On, Normal?”, followed by trick questions like “Compression: Lossy or Lossless?”… etc. and etc.

Today, many professional digital photographers began to take pride in “setting their camera professionally” rather than concentrate on creating excellent images. Photography seems to have “developed more professionally” in recent digital days, cause to operate a DSLR is 100 times more difficult than an old film SLR!

And so we started thinking, maybe we can charge our clients more, since photography has gone so “difficult”! We started to tell our clients how high-end our equipments are, how difficult to use them, how expensive they cost, in order to justify and convince our clients to buy our services. I always thought as a proficient photographer, shouldn’t we be confident that our clients engage us because our works are good, not because of what equipment we own?


Olympus E-P1, B&W art filter

Olympus E-P1, B&W art filter 6:6 format

Olympus E-P1, B&W art filter

Olympus E-P1, B&W art filter, 4:3 format

The Olympus E-P1 is a camera so small that it fits into your bag easily. I have been carrying it and using it almost everyday since I bought it about 2 months ago. I use it for shooting “nonsense” in my daily life, use it for casual street shooting, and even use it for my professionally-paid wedding jobs!

I was caught previewing on the E-P1. DON'T SPEND TIME ON PREVIEWS! CONCENTRATE ON GETTING YOUR SHOTS!

I was caught previewing on the E-P1. DON'T SPEND TIME ON PREVIEWS! CONCENTRATE ON GETTING YOUR SHOTS!

FOR THE GEEKS:

The ISO is absolutely usable up to 3200. The default setting already produces fantastic images. It’s Auto ISO is also pretty reliable (I hardly have to switch it about). It’s IS (image stabilization) is most impressive! I ever use it down to 1/2 sec and still get a reasonably sharp picture.

You can choose to set “Graduation” to “Normal” instead of “Auto” to get deeper blacks but personally I prefer “Auto” as I prefer to increase contrast in Adobe Lightroom when necessary. I find that images can get too contrasty sometimes if I set it to “Normal”.

Olympus E-P1, Pin-hole effect art filter

Olympus E-P1, Pin-hole effect art filter, 4:3 format

Olympus E-P1, Pin-hole effect art filter, 6:6 format

Olympus E-P1, Pin-hole effect art filter, 6:6 format

Olympus is amazing in it’s in-camera processing! It produces such good Jpegs that you almost have no necessity to shoot in RAW for easy post-processing. It’s absolutely a camera for people who just want to concentrate on ARTS and have minimal worries on camera settings or post-processing.

Also, you can choose to shoot in 4:3 format (default), 16:9 format, 3:2 format or 6:6 format for your creativity.

I fell in love with E-P1 files once I laid my eyes on it in a camera store downtown and immediately ordered one for myself. I find that Olympus’s digital files are processed in such a way, closest to what film achieves comparing to other brands. Being a fervent film shooter, I can easily appreciate Olympus’s efforts in processing their digital files closest to what film achieves. (But if you really like film, shoot film! Digital still has it’s digital characteristics in it.)

I have used the Canon 5D, the Nikon D700 (owned 2 of each at my craziest times). I have gone through post-processing my images since “Adobe Photoshop 5″ days. I would say this digital route for me since the Canon D60 (if anyone still remembers what it is) has been crazy! (I plan to write about my crazy path of switching from film to digital in a later post, so keep me bookmarked if you are interested).

What I can say is that after comparing the Canon files, the Nikon files and the Olympus files, I love the Olympus files the most! (Olympus is not paying me to say this)

I love the noise (It’s different from the Canon or Nikon’s noise), I love the skin tones, I love the contrast, I love the blacks (Nikon and Canon somehow captures blacks as grays), I love the colors and I love it’s Grainy Black and White and Pin-hole Art Filters!

Shot by my wife using "sunset mode". She's not a photographer, if you know what I mean.

Shot by my wife using "sunset mode". She's not a photographer, if you know what I mean.

Then, I love it’s handsome looks and it’s size too.

The best camera is the camera you can easily grab and use when opportunity arises. If you are looking for a camera that can boost your creativity, and it’s light and easy to carry around, with quiet and unobtrusive shutter sound, achieves jpeg files that require minimum post-processing, plus an added convenience of HD video recording (get an adaptor for leica m-mount lenses and you can easily achieve cinematic effects with F1.4 blur)… … … …

THIS CAMERA IS FOR YOU!